Setting up an SSL certificate on your website is critical to ensuring secure communication between your site and its visitors. It boosts user trust, protects sensitive information, and enhances SEO rankings. If you’re managing your hosting via the Plesk Panel, the process becomes more straightforward, thanks to Plesk’s intuitive interface and rich features. This guide will take you through every detail, from understanding Plesk to installing an SSL certificate, focusing on Let’s Encrypt and custom certificates.
Introduction to Plesk and Why It Stands Out
Plesk is a comprehensive web hosting control panel that simplifies server and domain management. Its user-friendly interface, robust security features, and extensive extensions make it a go-to solution for website owners and developers. With Plesk, you can efficiently manage hosting settings, databases, email accounts, and security measures, including SSL certificates.
Why Choose Plesk for SSL Setup?
- Ease of Use: Plesk’s intuitive design makes SSL certificate installation straightforward, even for non-technical users.
- Integrated Tools: Plesk supports Let’s Encrypt, enabling quick installation and auto-renewal of SSL certificates.
- Flexibility: You can install third-party SSL certificates if you prefer.
- Security: SSL/TLS management tools ensure robust encryption and better site security.
What is an SSL Certificate, and Why Do You Need It?
An SSL certificate encrypts the data exchanged between your website and its users, making it unreadable to malicious actors. Here are the key benefits of using SSL:
- Enhanced Security: Protects sensitive information like passwords, credit card details, and personal data.
- Improved SEO: Search engines prioritize secure sites in rankings.
- User Trust: Visitors are more likely to trust a site with “https://” in the URL and a padlock icon.
- Compliance: Many regulations, like GDPR and PCI DSS, require SSL implementation.
Now, let’s dive into setting up an SSL certificate on your Plesk Panel.
Step-by-Step Guide to Setting Up an SSL Certificate on Plesk Panel
Step 1: Prepare Your Domain for SSL Installation
Before you begin, ensure your domain resolves to the public IP address of your Plesk server. Use tools like DNS Lookup by MxToolBox to verify.
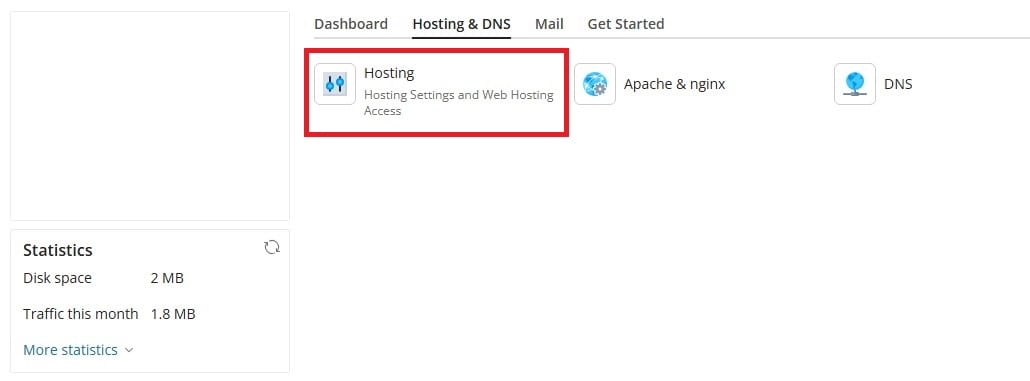
- Log in to Plesk.
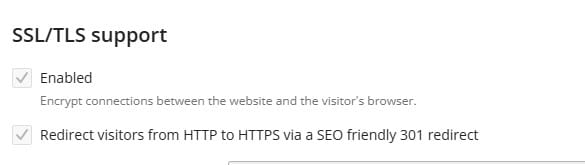
- Navigate to Domains > [your domain] > Hosting & DNS > Hosting Settings.
- Check the box for SSL/TLS Support, then click OK or Apply.
Step 2: Installing Let’s Encrypt SSL on Plesk
Let’s Encrypt is a free SSL certificate authority supported natively by Plesk.
Install the Required Extensions
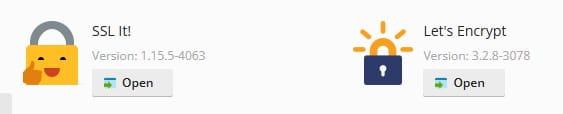
- Go to Extensions in your Plesk panel.
- Search for and install the SSL It! and Let’s Encrypt extensions.
Issue the Certificate
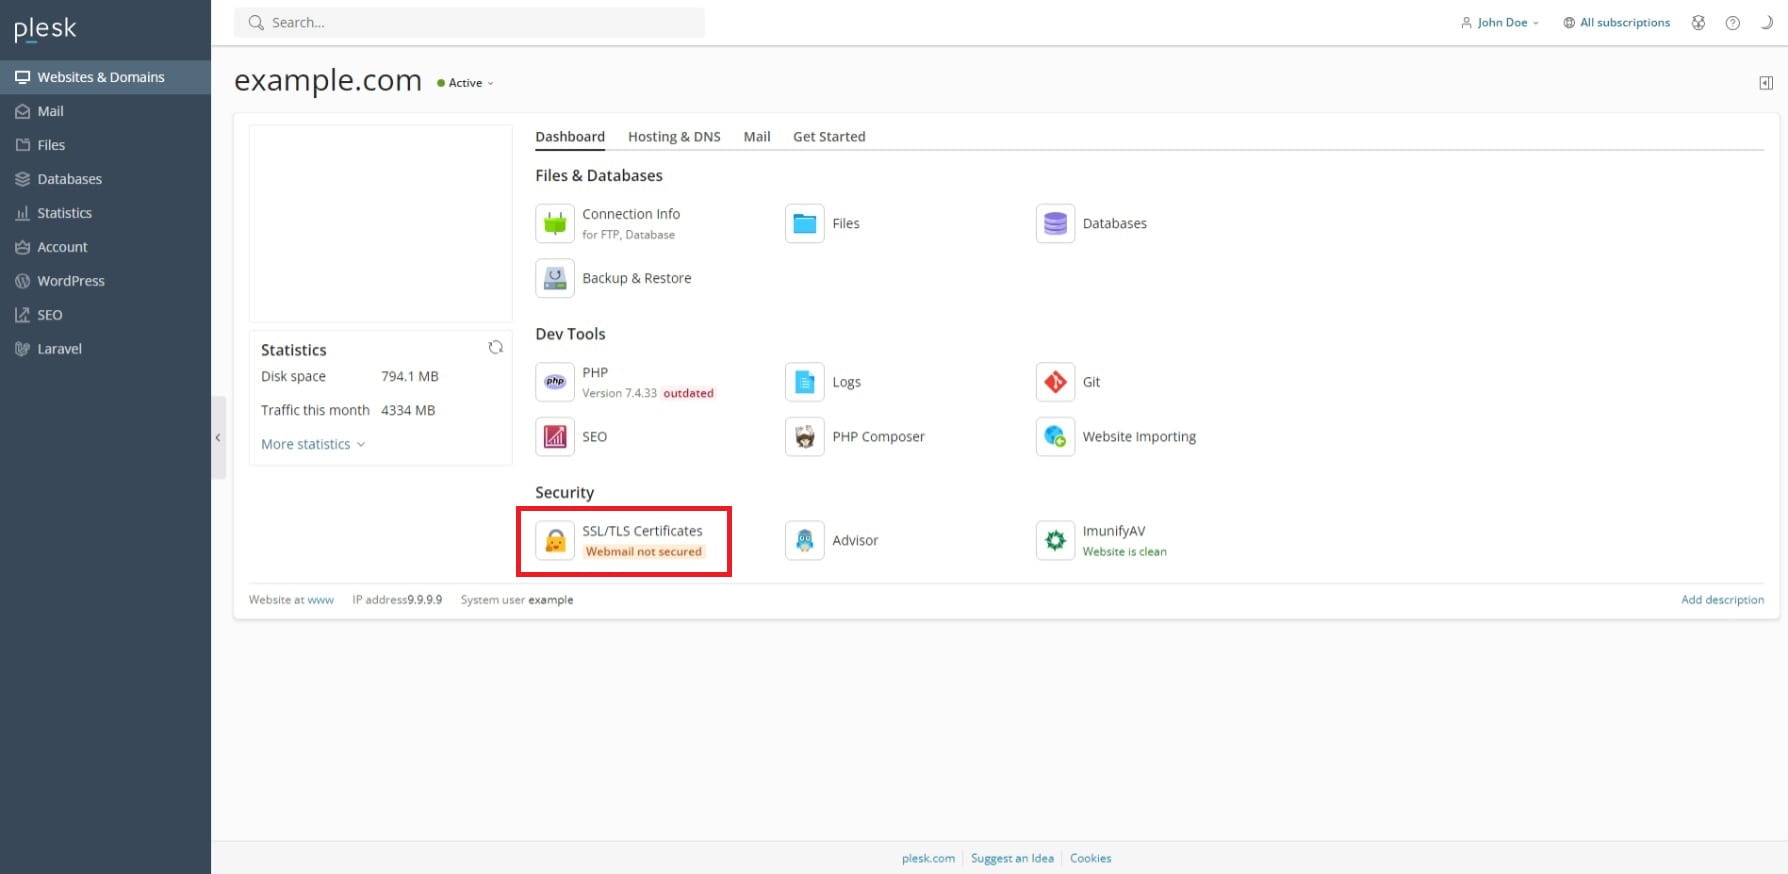
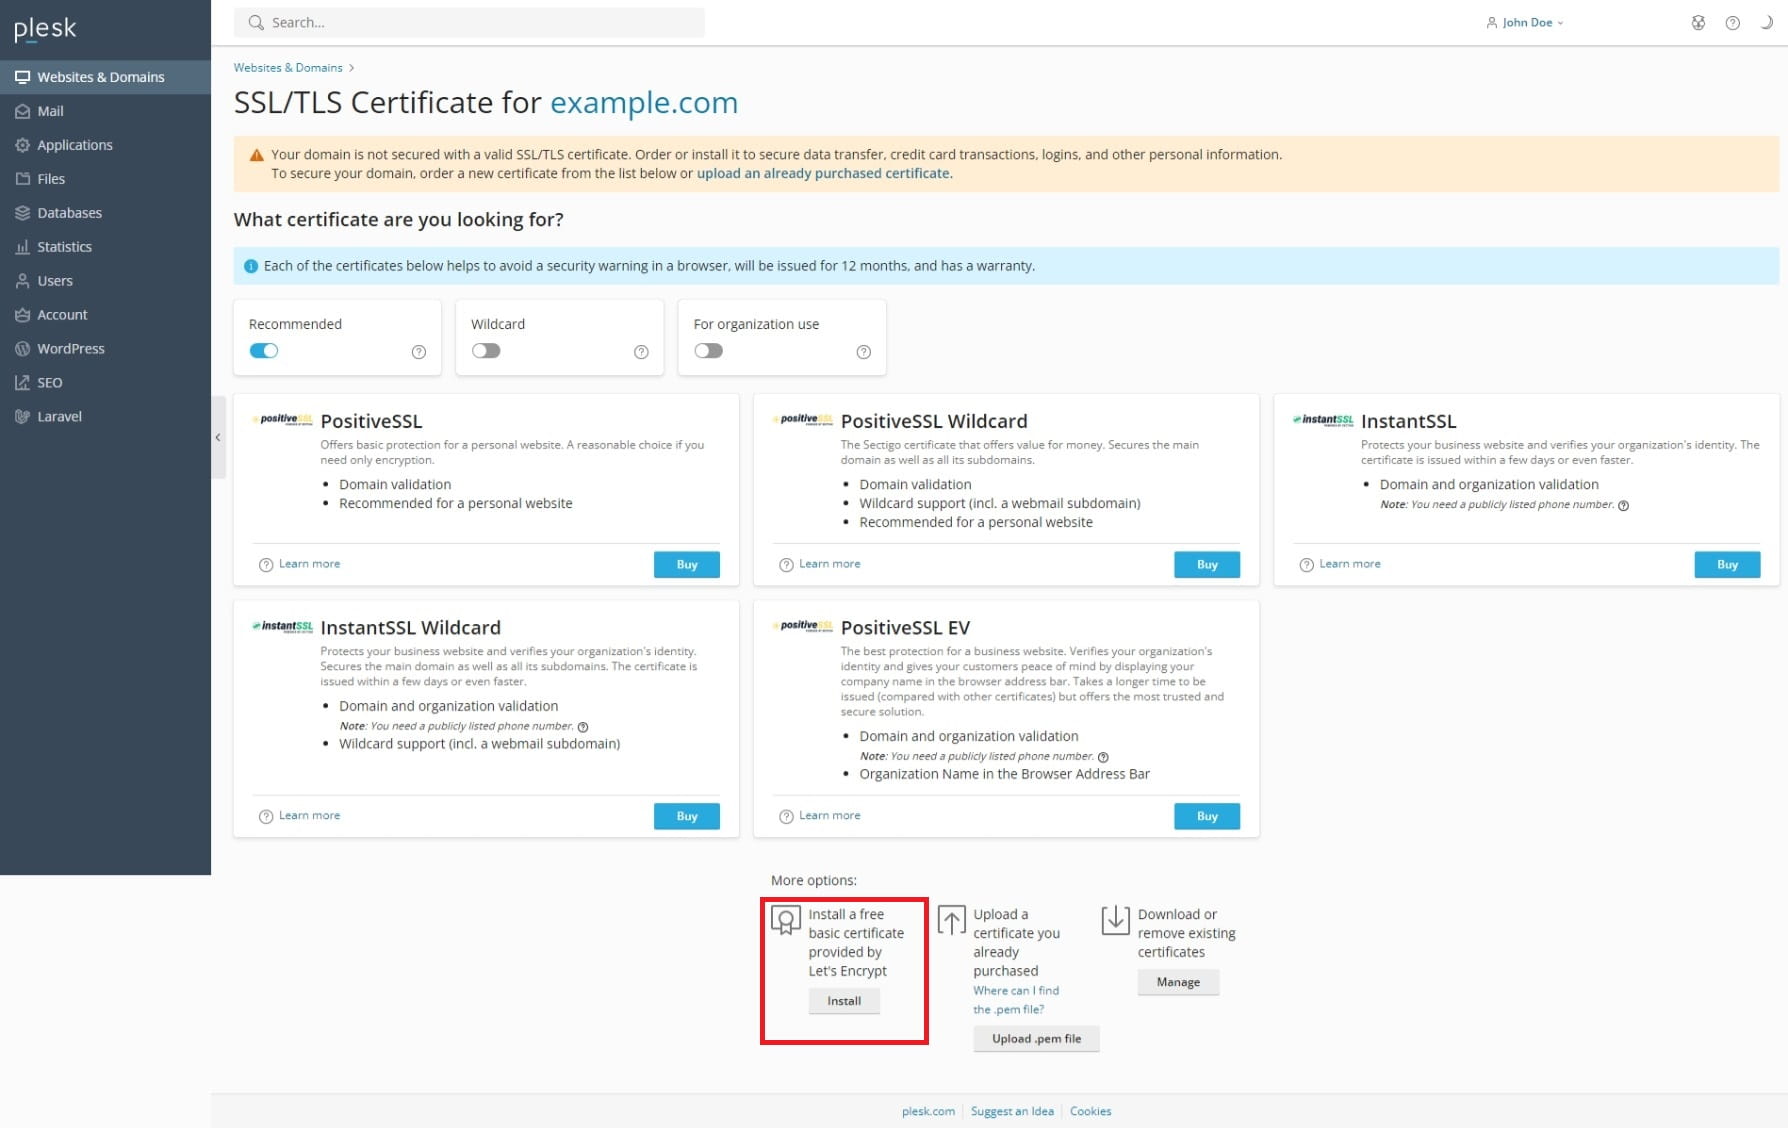
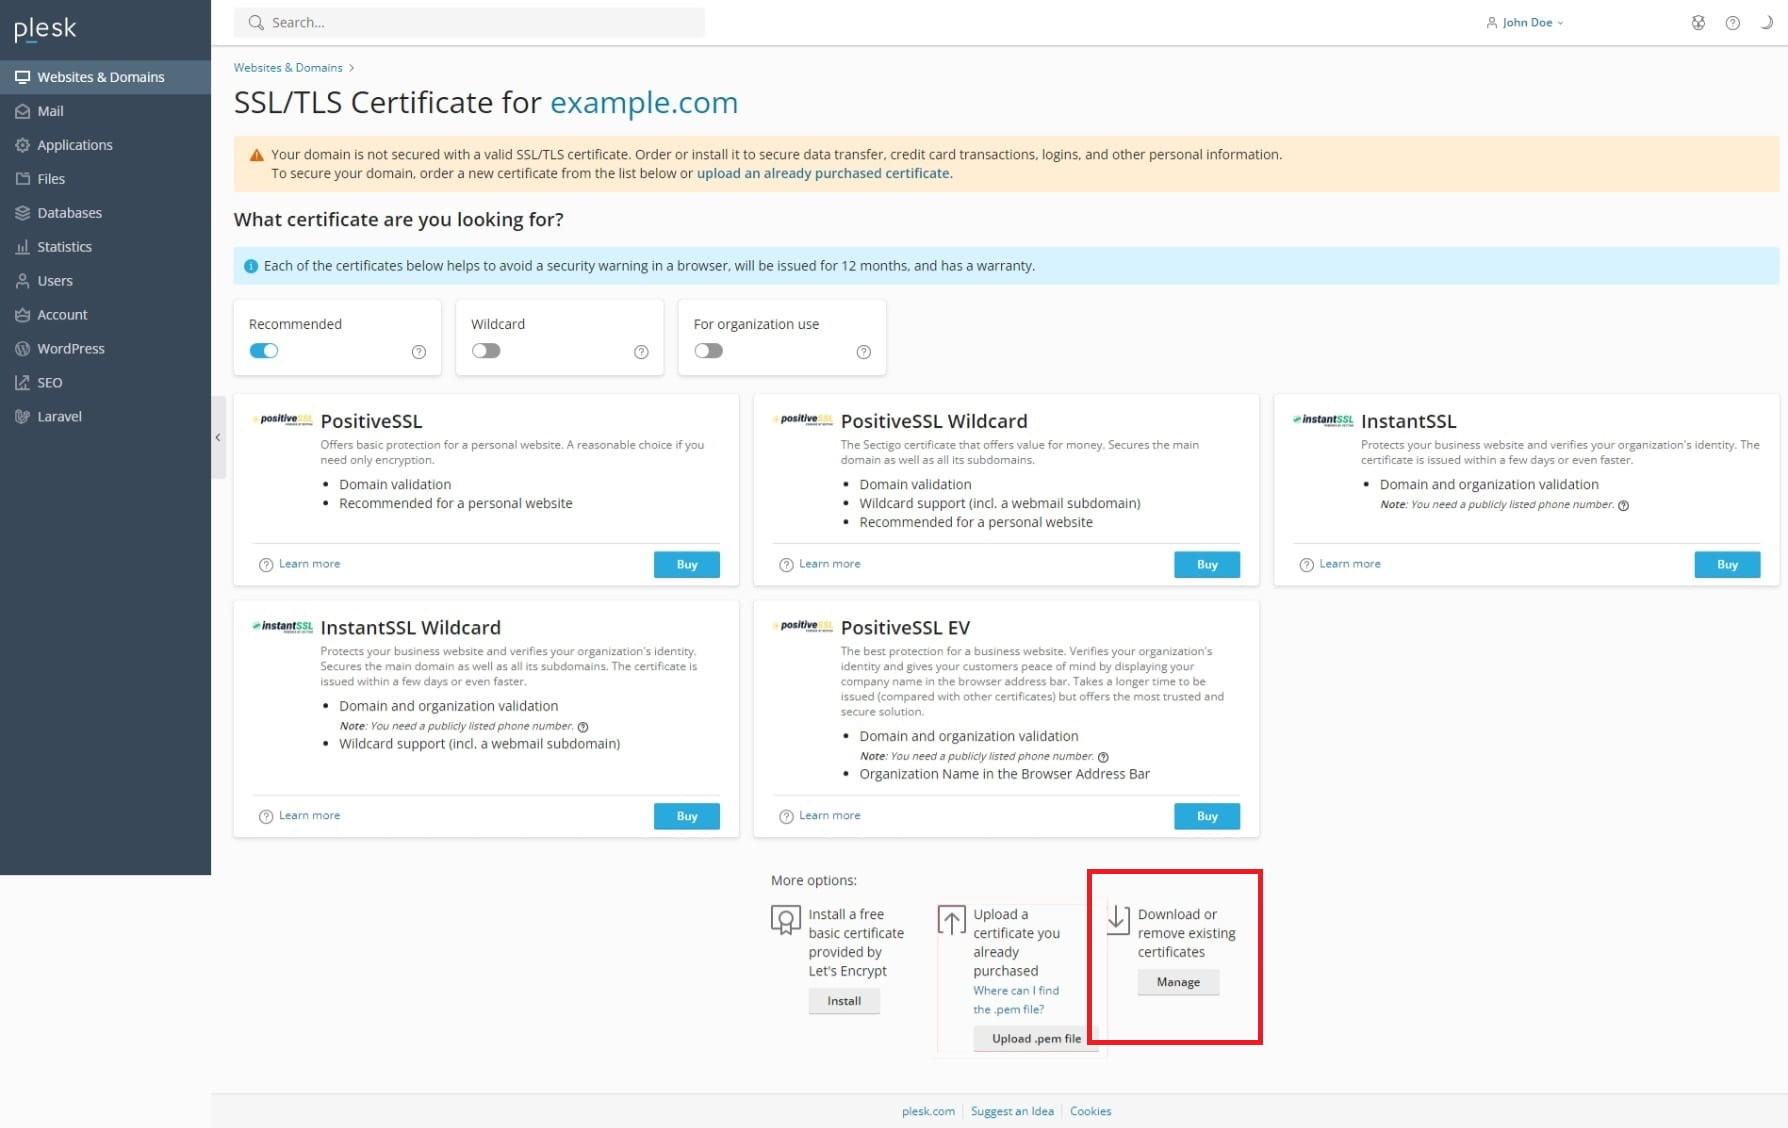
- Navigate to Domains > [your domain] > SSL/TLS Certificates.
- Scroll to the More Options section and click Install a free basic certificate provided by Let’s Encrypt.
- Select options:
- Secure the domain name.
- Include “www” subdomain.
- Secure webmail.
- Assign the certificate to the mail domain.
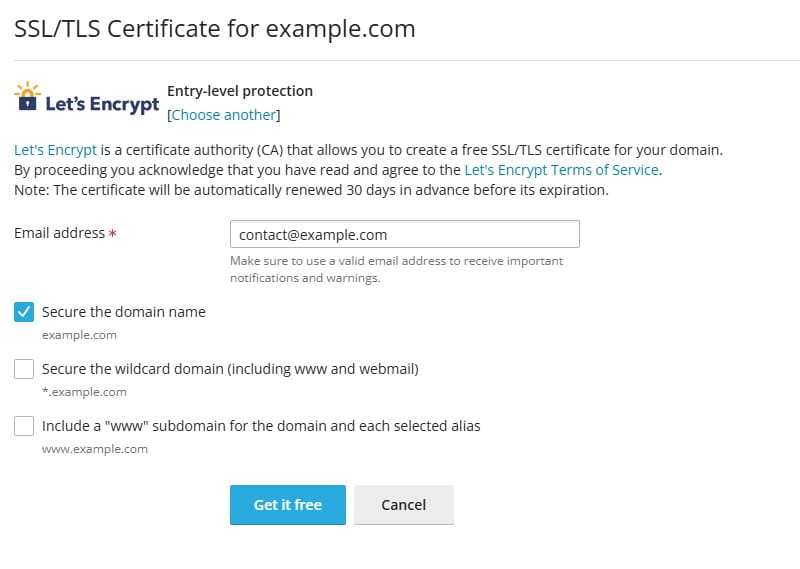
- Enter your email for notifications, then click Get it Free.
The Let’s Encrypt SSL certificate will now be installed and assigned to your domain.
Step 3: Installing a Custom SSL Certificate
If you have purchased an SSL certificate from a third-party vendor, follow these steps:
Prepare Your Certificate Files
- Ensure you have the following:
- Private Key (*.key)
- Certificate (*.crt or *.pem)
- CA Certificate (*-ca.crt)
Add the Certificate to Plesk
- Log in to Plesk.
- Go to Domains > [your domain] > SSL/TLS Certificates > Manage.
- Click Add SSL/TLS Certificate.
- Paste the content of your certificate files into the appropriate fields:
- Private Key
- Certificate
- CA Certificate
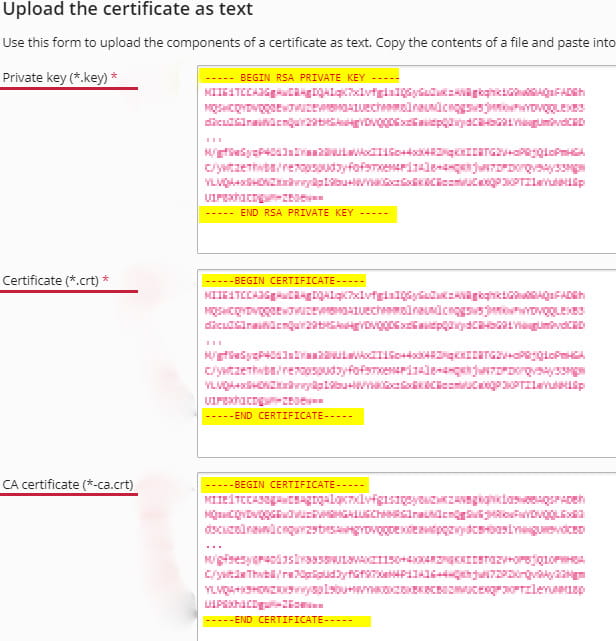
- Click Upload Certificate.
Apply the Certificate
- Navigate to Domains > [your domain] > Hosting Settings.
- Enable SSL/TLS Support and select your uploaded certificate from the dropdown menu.
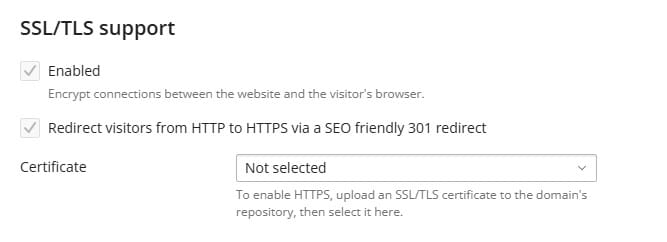
- Click OK.
Your custom SSL certificate is now active for the domain.
Common Issues and Troubleshooting Tips
Domain Not Resolving to Plesk Server
Ensure the domain’s DNS settings point to your server’s public IP. Update A or CNAME records if necessary.
Let’s Encrypt Certificate Fails to Issue
- Check if the domain resolves correctly.
- Ensure the Let’s Encrypt extension is up-to-date.
- Review the error logs in Tools & Settings > Let’s Encrypt.
SSL Not Showing on the Website
Verify that the installed certificate is assigned in Hosting Settings. Also, clear your browser cache to view the updated HTTPS status.
Advantages of Using Let’s Encrypt SSL
- Cost-Free: Ideal for startups and small businesses.
- Automatic Renewal: No need for manual updates.
- Widely Supported: Compatible with most modern browsers.
FAQs
How often does Let’s Encrypt SSL renew?
Let’s Encrypt certificates are valid for 90 days and automatically renew through Plesk.
Can I use a wildcard SSL with Plesk?
Yes, you can issue wildcard certificates through Let’s Encrypt or upload a third-party wildcard certificate.
What happens if my SSL certificate expires?
Your site will display a security warning. To avoid this, ensure auto-renewal is enabled.
Is Plesk suitable for beginners?
Absolutely! Plesk’s user-friendly interface is perfect for beginners and advanced users alike.
Can I secure multiple domains with one certificate?
Yes, you can secure multiple domains using a multi-domain SSL (SAN) certificate or wildcard SSL.
What should I do if I face issues with SSL setup?
Contact your hosting provider or refer to Plesk’s support documentation for assistance.
Conclusion
Securing your website with an SSL certificate is no longer optional—it’s a necessity for trust, security, and SEO. Plesk makes this process remarkably simple, whether you choose Let’s Encrypt or a custom certificate. By following the steps outlined in this guide, you can ensure that your website is secure, compliant, and optimized for a better user experience.