
HTTP authentication is a simple and secure way to protect sensitive content from unauthorized users. This article will show you how to set up basic HTTP authentication on an NGINX server running on Ubuntu and CentOS.
Prerequisites
- An Ubuntu 16.04, 18.04, 20.04 or 22.04 LTS / CentOS version 6, 7 or 8 server with a non-root user with sudo privileges.
- NGINX installed on the server. If you need help installing NGINX, you can follow this installation guide.
Step 1: Create an Authentication File
We will start by creating an authentication file. This file will contain the username and password combinations that will be used for authentication.
First, create an authentication file with the username and password combinations. Replace username with the username you want to use and password with the corresponding password:
$ sudo htpasswd -c /etc/nginx/.htpasswd usernameWhen you are prompted, enter the desired password for the username:
Password: password
Verifying - Password: password
Repeat the above steps for each username and password combination you want to add.
Step 2: Configure NGINX
We can now set NGINX to utilize our authentication file that we created.
First, open the NGINX configuration file in a text editor:
$ sudo nano /etc/nginx/sites-available/defaultThe default configuration file contains a server block that looks like this:
server {
        listen 80 default_server;
        listen [::]:80 default_server;

        root /var/www/html;

        index index.html index.htm index.nginx-debian.html;

        server_name _;

        location / {
                try_files $uri $uri/ =404;
        }
}
We will add an auth_basic directive to the location block. This directive will tell NGINX to use our authentication file for authentication. The location block should now look like this:
location / {
        try_files $uri $uri/ =404;
        auth_basic "Restricted Content";
        auth_basic_user_file /etc/nginx/.htpasswd;
}
When you’re finished, save and close the file.
Step 3: Test the Configuration
Now that we have configured NGINX to use basic HTTP authentication, we can test the configuration.
First, verify that there are no syntax errors in the configuration file:
$ sudo nginx -tIf there are no syntax errors, restart NGINX to apply the changes:
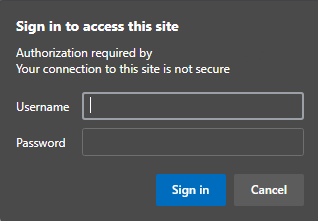
$ sudo systemctl restart nginxIn conclusion, When you access information that is protected by authentication, you will be prompted for a username and password.
Conclusion
In this article, we showed you how to set up basic HTTP authentication on an NGINX server running on Ubuntu or CentOS. This is a simple and secure way to protect sensitive content from unauthorized users.