Remote Desktop Services (RDS), formerly known as Terminal Services, is a robust technology in the Windows Server operating system that allows multiple users to access a shared desktop or individual applications remotely. RDS enables businesses to centralize their applications and data while providing secure, efficient, and scalable remote access to users. In this comprehensive guide, we will walk you through the process of deploying and securing Remote Desktop Services (RDS) and Remote Desktop Protocol (RDP) on a Windows Server.
Introduction
Remote Desktop Services is a valuable tool for organizations looking to provide remote access to applications and desktops while maintaining control and security over their resources. Before we delve into the deployment and security aspects, let’s briefly discuss the benefits of RDS:
- Centralized Management: RDS allows administrators to manage applications and desktops from a central location, making it easier to deploy software updates, manage user access, and troubleshoot issues.
- Cost-Efficiency: By using RDS, organizations can reduce hardware costs, as users access remote resources from lightweight client devices, such as thin clients or personal computers.
- Scalability: RDS can scale to accommodate a large number of users, making it ideal for organizations of all sizes.
- Enhanced Security: With proper configuration, RDS can provide a secure environment for remote access, minimizing the risk of data breaches and unauthorized access.
- Improved User Experience: RDS ensures a consistent and reliable user experience, even over low-bandwidth connections.
Now, let’s dive into the step-by-step process of deploying and securing RDS/RDP on Windows Server.
PS: Make Sure You Install Active Directory Before this Installation You can Follow this Guide on How to Install Active Directory on Windows Server.
Deployment of RDS/RDP on Windows Server
Step 1: Install the Remote Desktop Services Role
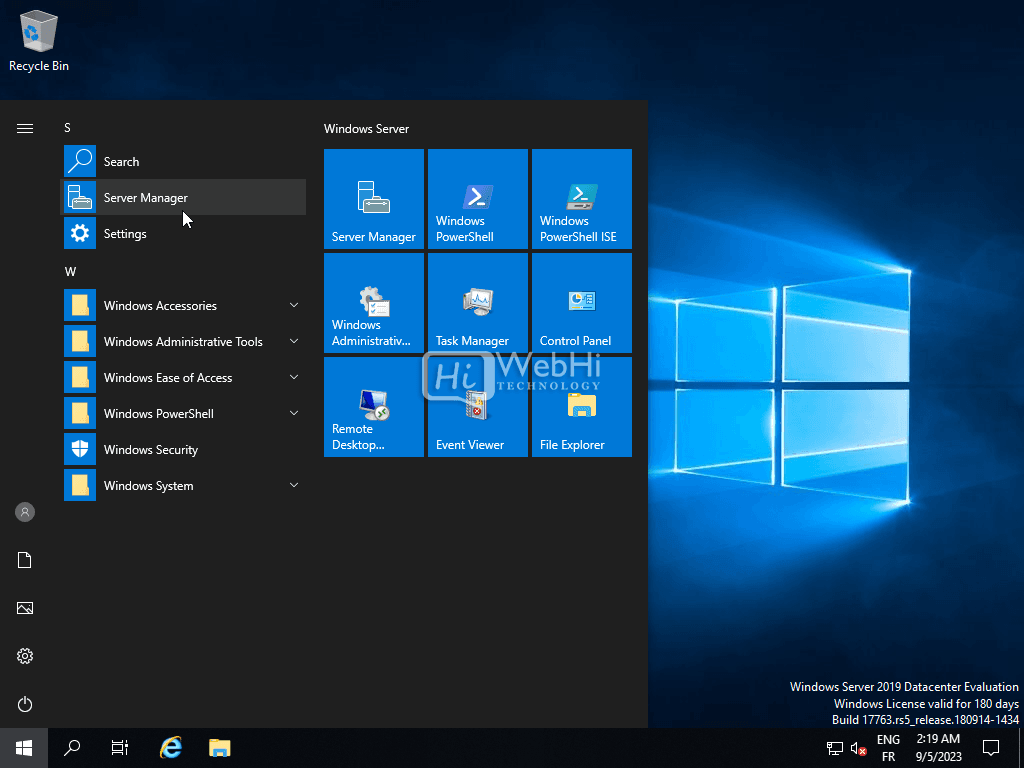
- Launch Server Manager: Log in to your Windows Server machine and open Server Manager. You can do this by clicking on the Server Manager icon in the taskbar or searching for “Server Manager” in the Start menu.
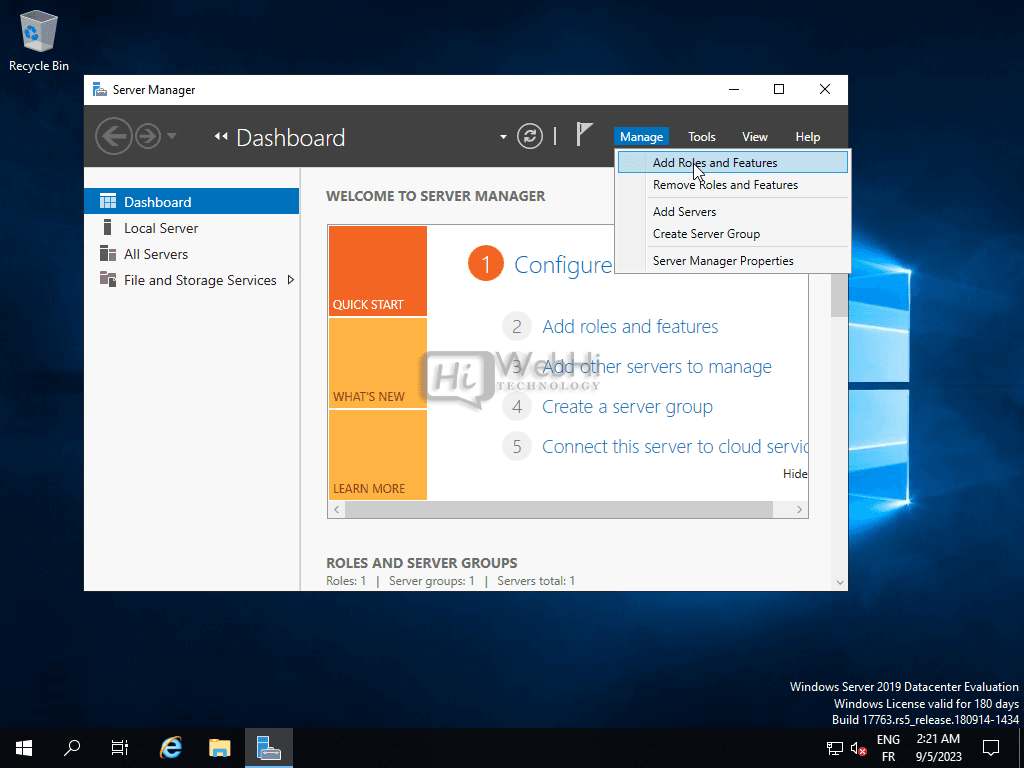
- Add Roles and Features: In Server Manager, click on “Add roles and features” to open the wizard.
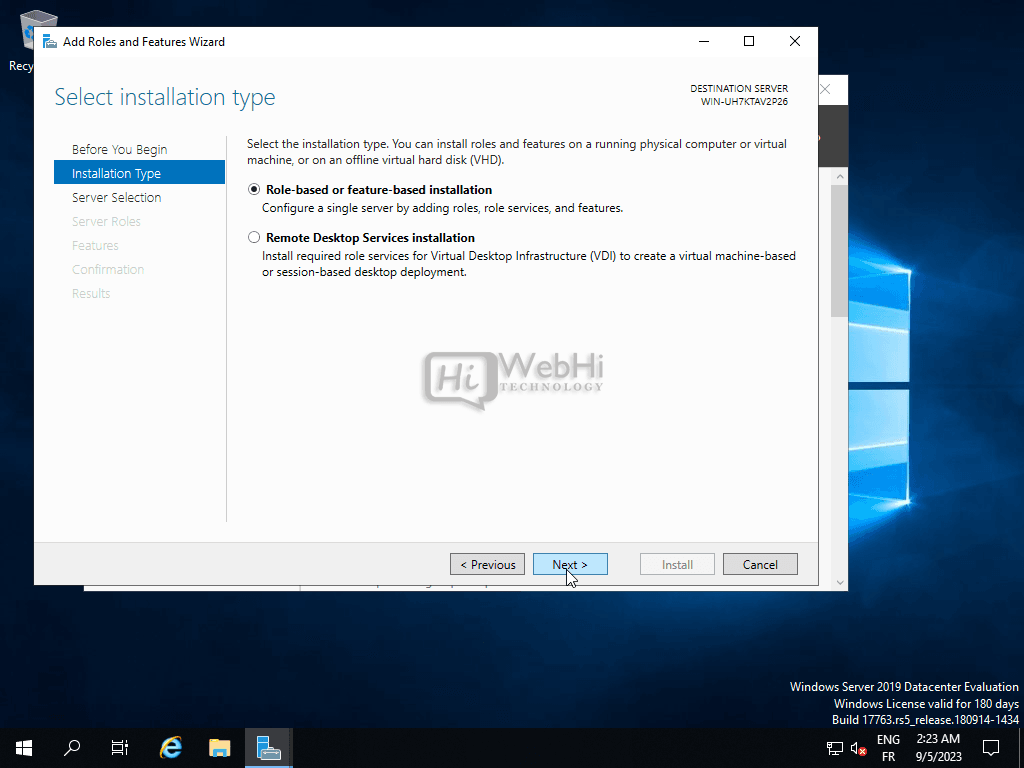
- Select Role-Based or Feature-Based Installation: Choose the “Role-based or feature-based installation” option and click “Next.”
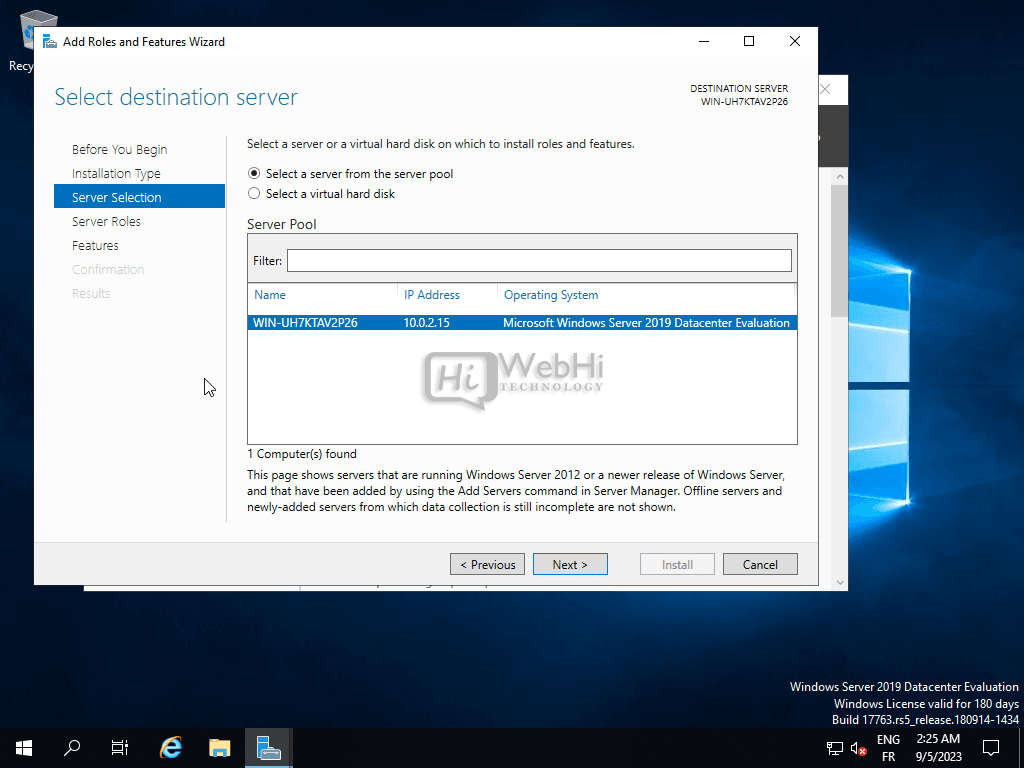
- Select the Server: Ensure your server is selected in the server pool and click “Next.”
- Choose Remote Desktop Services Installation: In the Roles list, select “Remote Desktop Services.” Click “Next” to proceed.
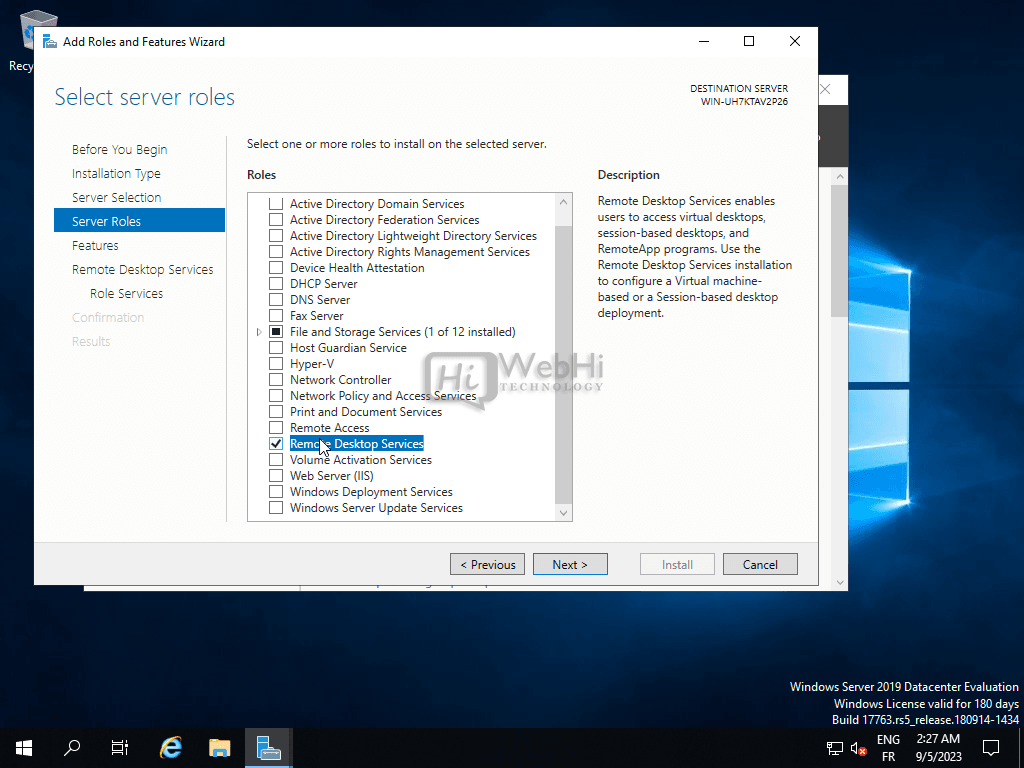
- Click “Next.”

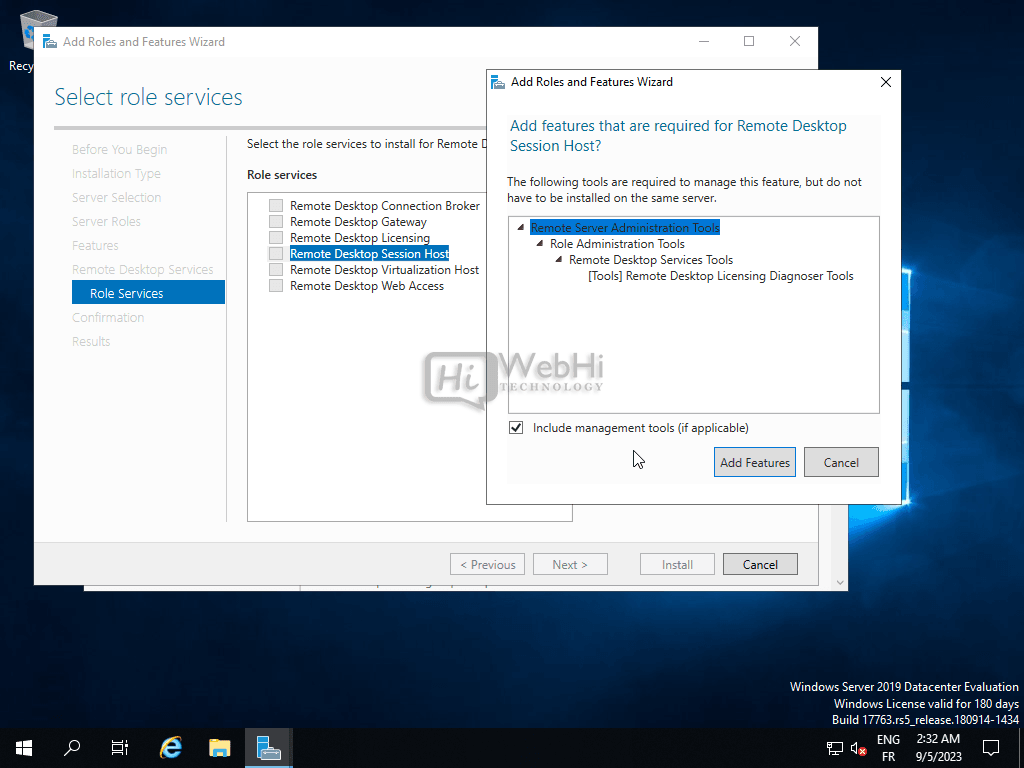
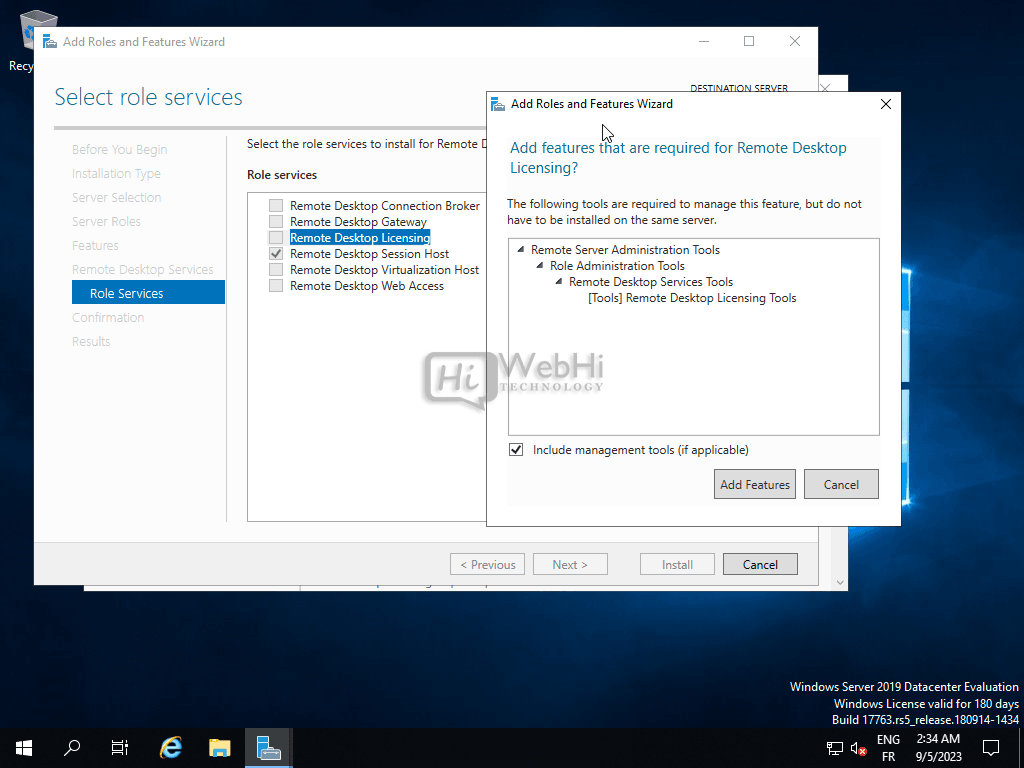
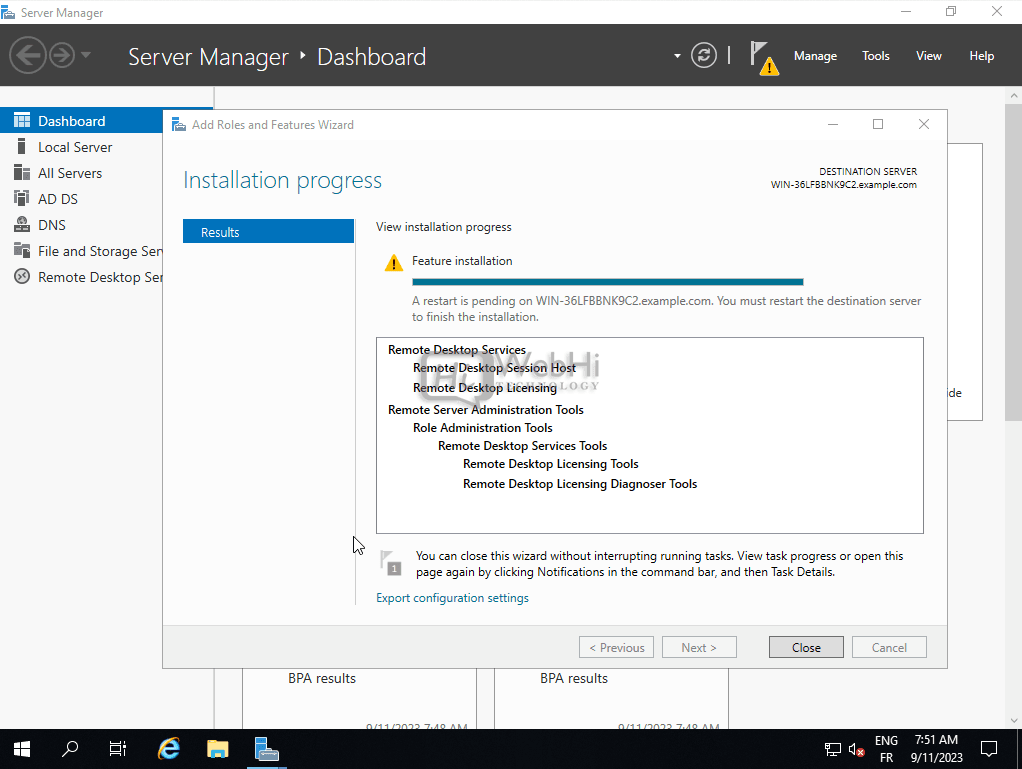
- Select Role Services: Choose the appropriate role services for your deployment. Typically, you will need to select “Remote Desktop Session Host” and “Remote Desktop Licensing.”
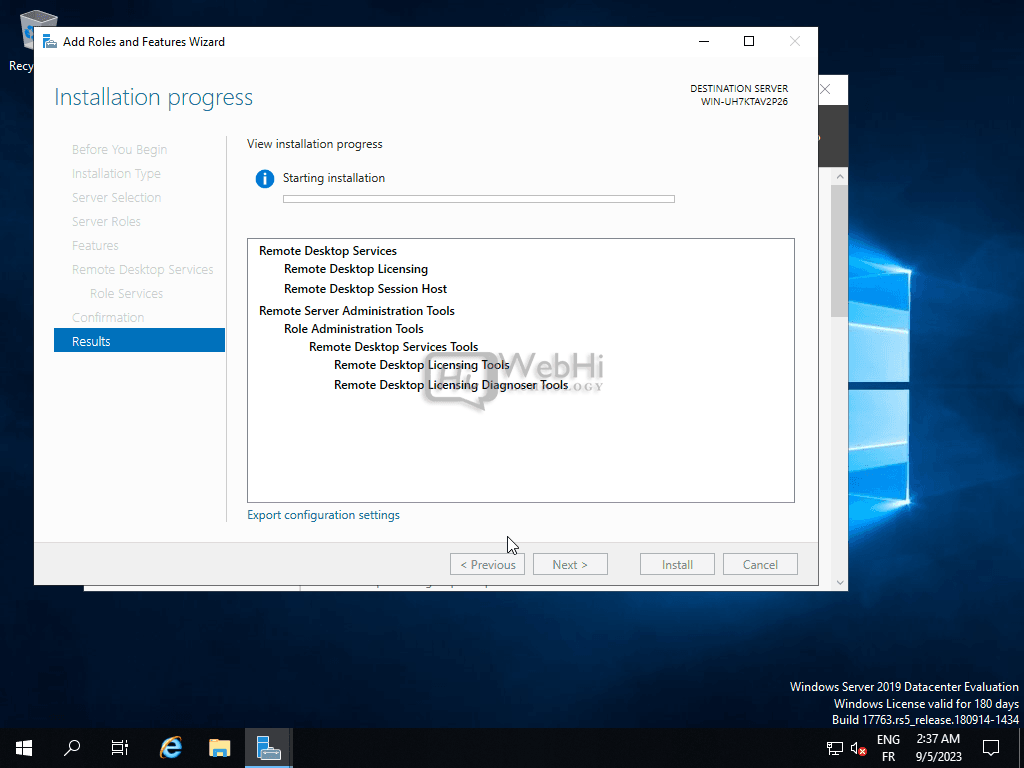
- Install: Review your selections, click “Install,” and wait for the installation to complete.
Step 2: Configure Remote Desktop Services
- Launch the Remote Desktop Services Configuration: After the installation is complete, open the “Remote Desktop Services Configuration” from the Server Manager.
- Configure Licensing: Set up licensing by selecting “Remote Desktop Licensing” and specifying the licensing mode (Per User or Per Device). Activate your license server if necessary.
- Configure Remote Desktop Session Host: In the “Remote Desktop Session Host Configuration” section, you can configure various settings, such as user profile paths, session settings, and security. Customize these settings based on your organization’s requirements.
- RD Gateway Configuration: If you plan to allow remote access from outside your network, configure the RD Gateway settings, including server farm and SSL certificates.
- RD Web Access: Set up the RD Web Access role if you want to provide a web-based interface for users to access remote resources.
Step 3: Publish Applications (Optional)
If you want to provide remote access to specific applications rather than full desktops, follow these steps:
- Install Applications: Install the desired applications on the Remote Desktop Session Host server.
- Publish Applications: In the Remote Desktop Services Configuration, go to “RemoteApp Programs” and click “Select Remote Programs.” Choose the applications you want to publish.
- Configure Permissions: Set up permissions for users or groups to access the published applications.
Step 4: Test Remote Desktop Access
- Connect to RDS: From a remote client computer, open the Remote Desktop Client (mstsc.exe). Enter the IP address or hostname of your RDS server and click “Connect.”
- Log In: Enter your credentials and log in to the remote session. You should now have access to the remote desktop or published applications.
Securing RDS/RDP on Windows Server
Ensuring the security of your RDS deployment is crucial to protect sensitive data and prevent unauthorized access. Here are essential security steps:
Step 1: Enable Network Level Authentication (NLA)
- Access Remote Desktop Settings: Right-click on “Computer” or “This PC” on the server, select “Properties,” and click “Advanced system settings.”
- Remote Tab: In the “System Properties” window, go to the “Remote” tab.
- Enable NLA: Under the “Remote Desktop” section, select “Allow connections only from computers running Remote Desktop with Network Level Authentication (recommended).”
Step 2: Secure Remote Desktop Gateway (RD Gateway)
- SSL Certificate: Use a trusted SSL certificate for the RD Gateway to encrypt data transmission.
- Authorization Policies: Implement strict authorization policies on the RD Gateway to control who can access the RDS resources.
Step 3: Firewall and Network Security
- Firewall Rules: Configure your firewall to allow RDP traffic only from trusted IP addresses.
- Network Segmentation: Consider placing RDS servers in a separate network segment to limit exposure to potential threats.
PS: To configure your firewall. You can follow this guide on How to configure Windows Server Firewall
Step 4: User Access Control
- Role-Based Access: Assign roles and permissions based on the principle of least privilege to restrict user access to only what is necessary.
- Account Lockout Policy: Implement an account lockout policy to thwart brute force attacks.
Step 5: Regular Updates and Patch Management
- Keep Software Updated: Regularly update the operating system and RDS components to patch known vulnerabilities.
Step 6: Monitoring and Logging
- Log Monitoring: Set up logging and monitoring tools to track and identify any suspicious activity.
- Audit Logs: Enable auditing for RDS-related events and regularly review audit logs for anomalies.
Conclusion
Deploying and securing Remote Desktop Services (RDS) and Remote Desktop Protocol (RDP) on Windows Server can greatly benefit organizations by providing efficient and secure remote access to applications and desktops. However, ensuring the security of your RDS deployment is paramount to protect your data and resources. By following the steps outlined in this guide, you can create a robust and secure RDS environment tailored to your organization’s needs.
Remember that security is an ongoing process, and it’s essential to stay vigilant, monitor for threats, and keep your RDS infrastructure up to date with the latest security patches and best practices.