Introduction
This tutorial will show you how to create a certificate signing request (CSR) for Exchange in PowerShell and then install an SSL certificate on your Exchange server. This tutorial works for Exchange version 2013, 2016 or 2019.
You can check Installing and Configuring an SSL Certificate in Microsoft Exchange Server for the GUI Version.
Step 1: Generate a CSR (certificate signing request).
Run this command to generate the certificate request.
[PS] C:\>$txtrequest = New-ExchangeCertificate –Server "EX01-2022" –GenerateRequest –FriendlyName "Exchange Certificate" –PrivateKeyExportable $true –SubjectName "c=MA, s=RABAT, l=Rabat, o=EXEMPLE, ou=IT, cn=mail.exemple.com" –DomainName mail.exemple.com,autodiscover.exemple.com
- Server: Specifies the Exchange Server on which the request will be generated.
- GenerateRequest: Makes a third party certificate request.
- FriendlyName: The friendly name of the certificate.
- PrivateKeyExportable: Enables exporting and importing of the certificate to other Exchange Servers.
- SubjectName: The certificate request’s topic field.
- DomainName: Indicates one or more FQDNs.
To export the certificate request to the shared folder, do the following command.
[PS] C:\>[System.IO.File]::WriteAllBytes('\\ex01-2022\Certs\ExchangeCrt.req', [System.Text.Encoding]::Unicode.GetBytes($txtrequest))
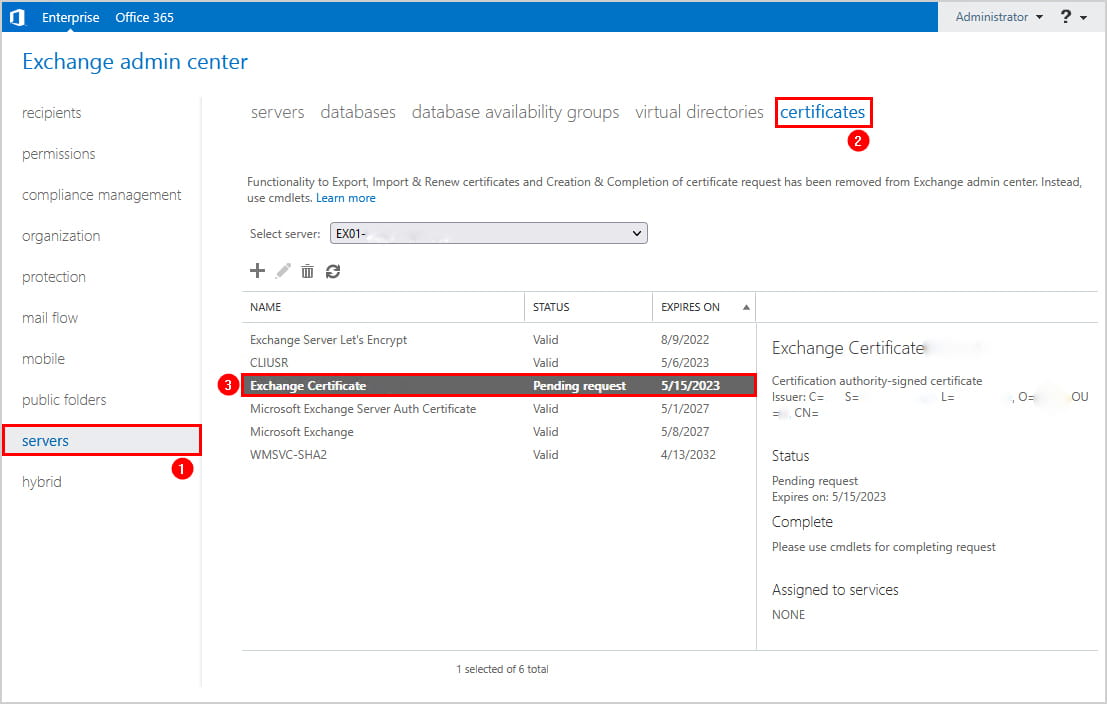
Open the Exchange Admin Center and log in. Open the servers > certificates menu. Ensure that the Exchange certificate is shown along with the pending request status.
Step 2 : Submit the Certificate
It is now time to contact your SSL certificate provider and present them with this CSR request in order to obtain a certificate file.
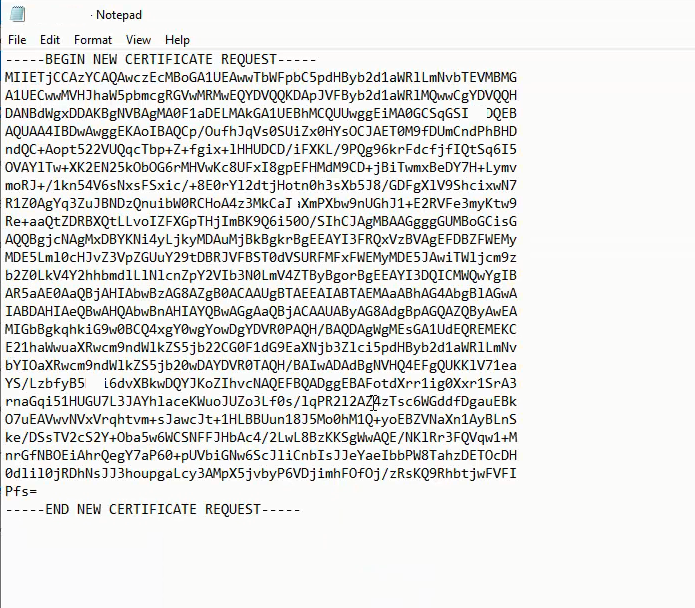
To open the file, use a text editor (such as Notepad). Then, copy the content and provide it in your SSL provider order, including the ——-BEGIN NEW CERTIFICATE REQUEST——- and ——-END NEW CERTIFICATE REQUEST——- tags. Some SSL providers ask for uploading the CSR.
You can check our SSL Certificates Service for cheap SSL certificates.
Once you have the certificate, let’s complete the setup.
Step 3 : Import the Certificate
You may now download the certificate from the Certificate Authority. The certificate may be downloaded and unpacked from the Certificate Authority and placed in the shared folder on Exchange Server.
Name the certificate something you can remember. The certificate name in our case is exchagecrt.crt.
[PS] C:\>Import-ExchangeCertificate -FileData ([System.IO.File]::ReadAllBytes('\\ex01-2022\Certs\exchagecrt.crt')) -PrivateKeyExportable:$true -Password (ConvertTo-SecureString -String 'P@ssw0rd' -AsPlainText -Force)The status of the Exchange certificate will be Valid.
Assign Exchange services to the certificate
Copy the certificate thumbprint by double-clicking the certificate.
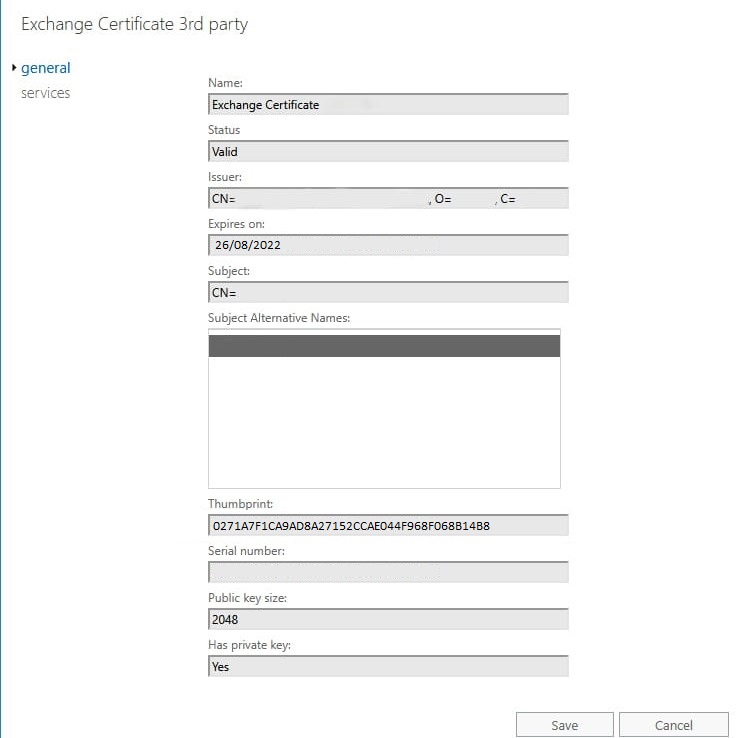
Run the command below to assign services to the certificate. Enter the thumbprint value you copied.
[PS] C:\>Enable-ExchangeCertificate -Server "EX01-2022" -Thumbprint 0271A7F1CA9AD8A27152CCAE044F968F068B14B8 -Services SMTP,IMAP,IIS -ForceRestart IIS service
Restart the IIS on the Exchange Server.
The certificate should now be installed successfully on your Exchange server.
3 thoughts on - Installing SSL Certificate in Exchange Server with PowerShell
thank you really helpful
thank you so kindly
Perfect! Very helpful. I use this blog every year to update certificates on my servers