Internet Information Services (IIS, formerly Internet Information Server) is an extensible web server software created by Microsoft for use with the Windows NT family ((usually it’s used with Windows server 2008 / 2012 / 2016 / 2019 / 2022)).
IIS supports HTTP, HTTP/2, HTTPS, FTP, FTPS, SMTP and NNTP. It has been an integral part of the Windows NT family since Windows NT 4.0, though it may be absent from some editions (e.g. Windows XP Home edition), and is not active by default.
Install IIS using the graphic interface (GUI).
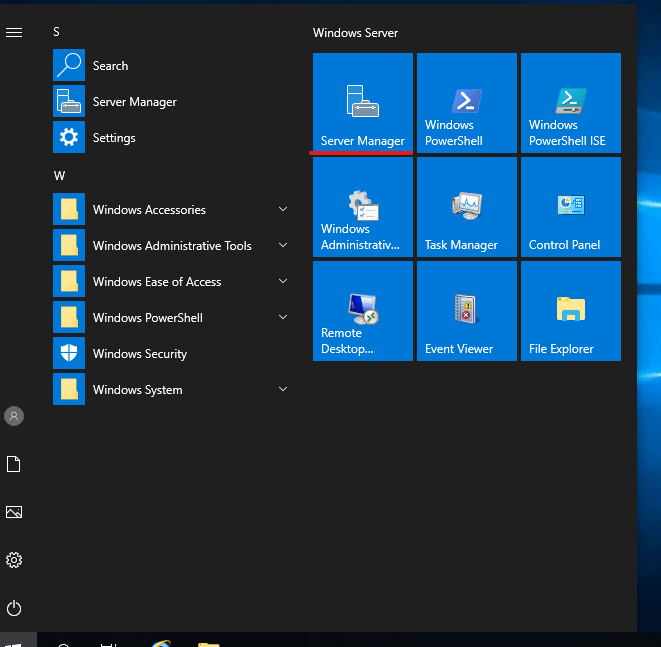
Open Server Manager, located on the startup menu. If it’s not there, simply type “Server Manager” with the start menu open, and it should be found in the search.
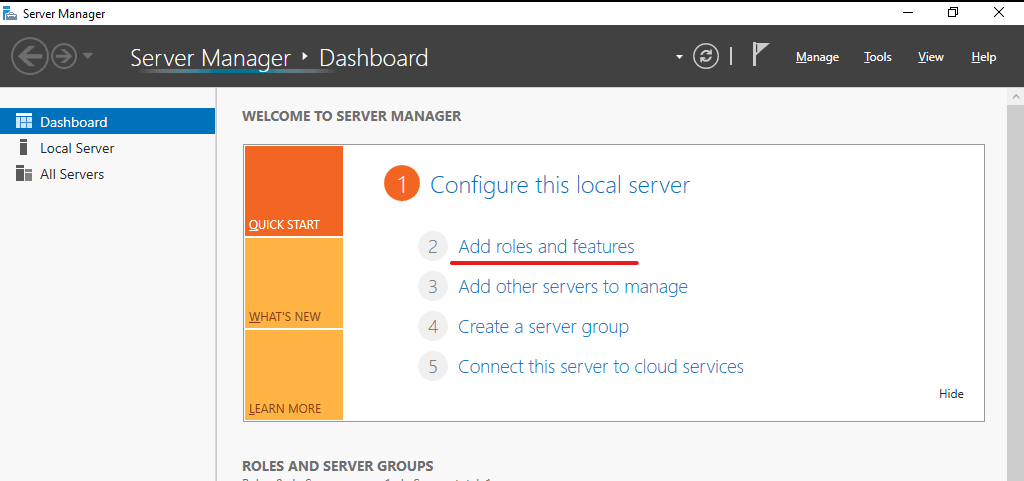
Wait for it to open, Now click on ADD ROLE AND FEATURES
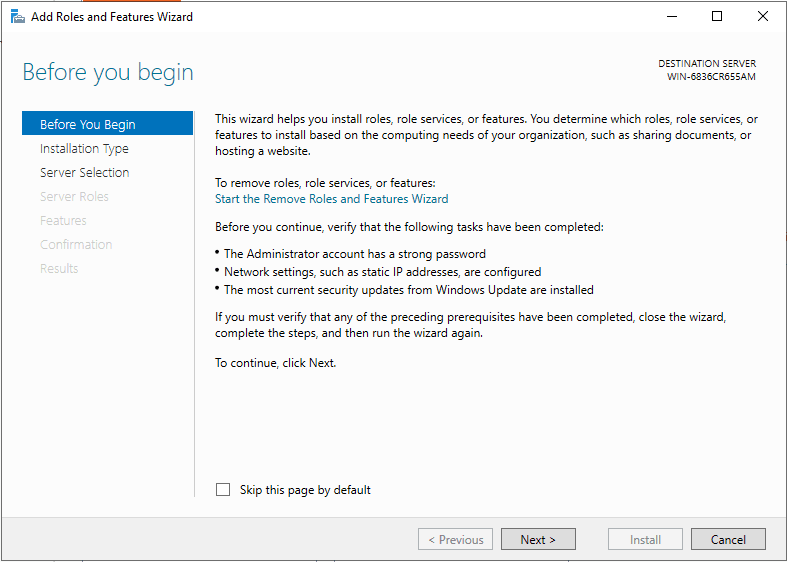
On The Next screen, click the Next button.
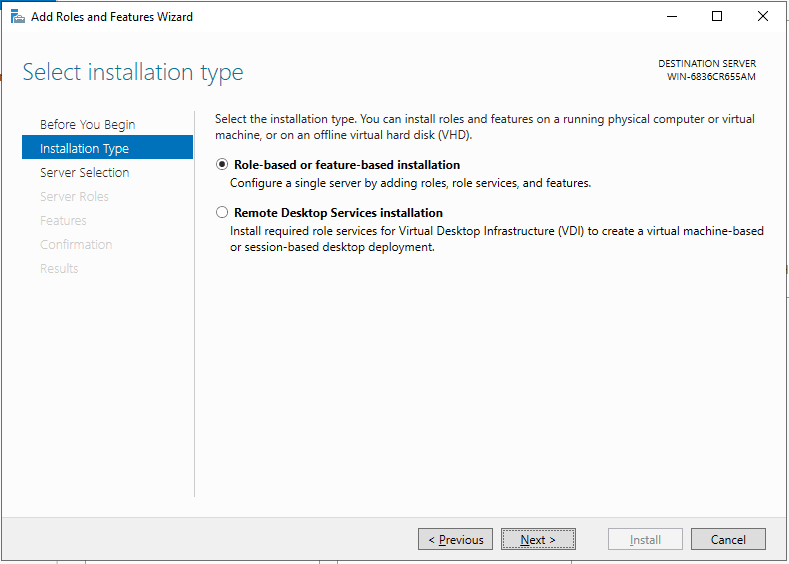
Select Role-based or feature-based installation and click Next.
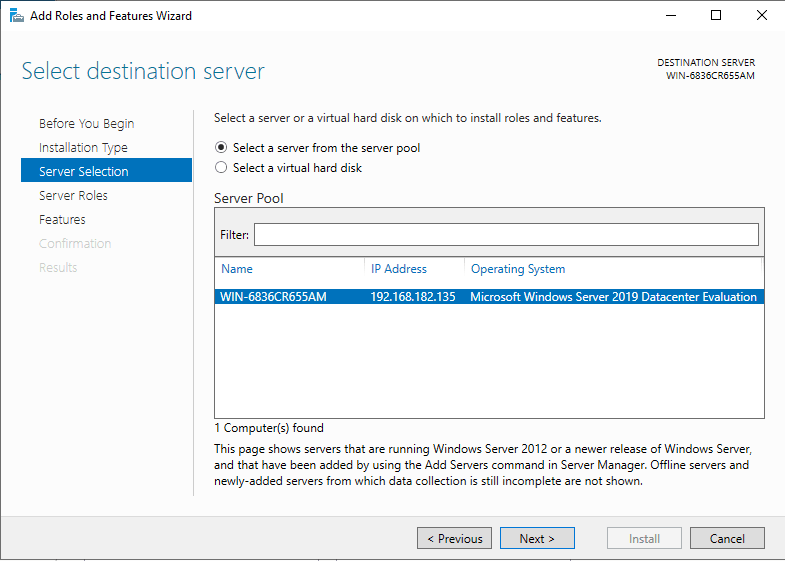
Select Server from servers list.
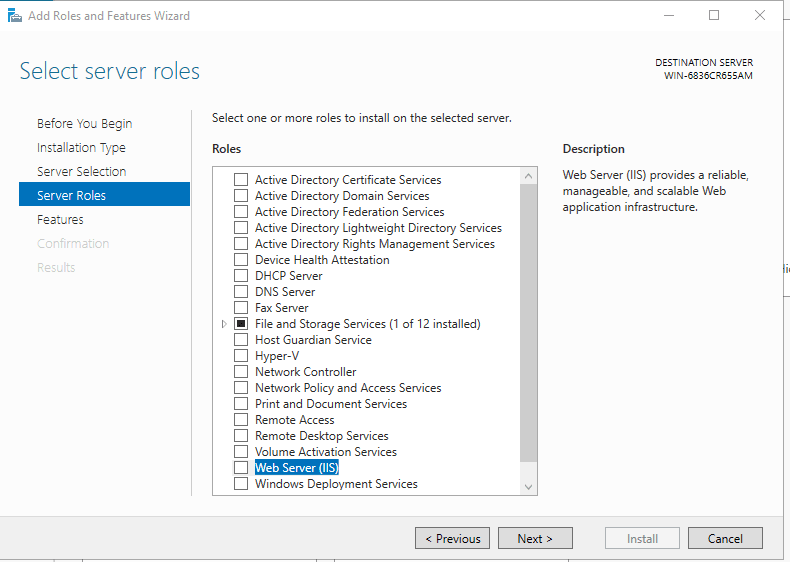
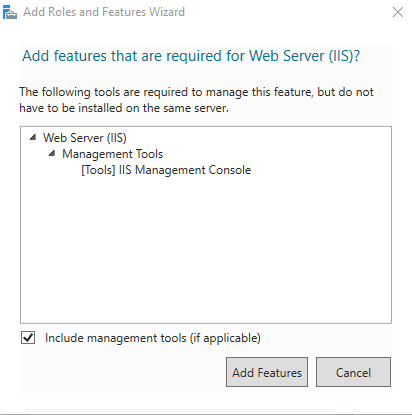
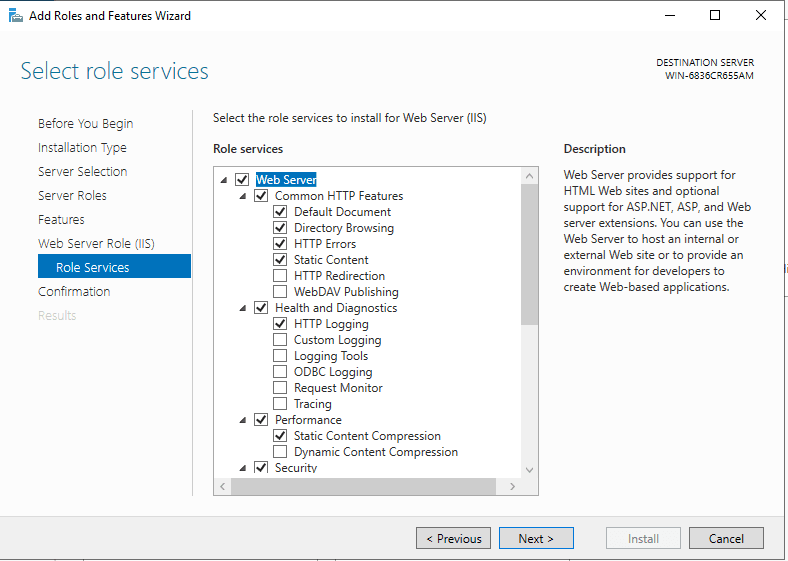
Click the checkbox beside “Web Server (IIS)” in the “select server roles” window. a new window will open to specify additional functions, simply click on the ‘Add Features’ button. When done, click Next Button.
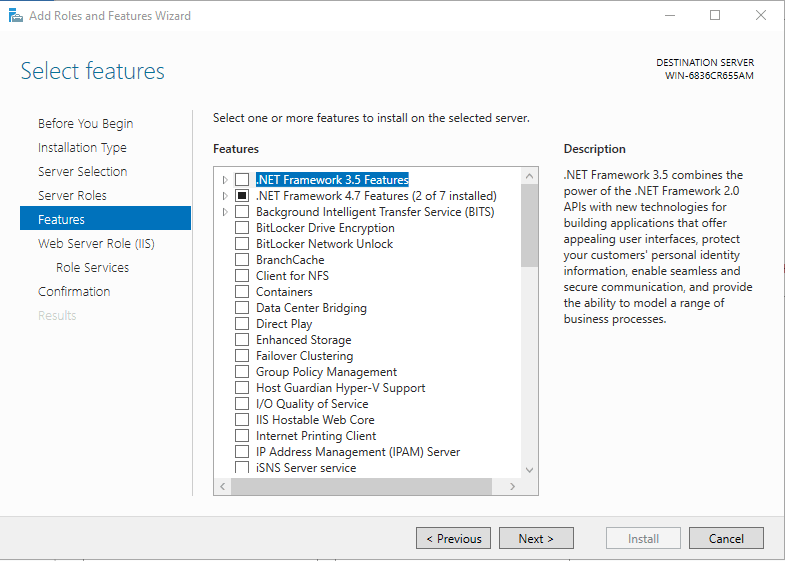
We won’t install additional features, so just click Next on this window.
Click next button again

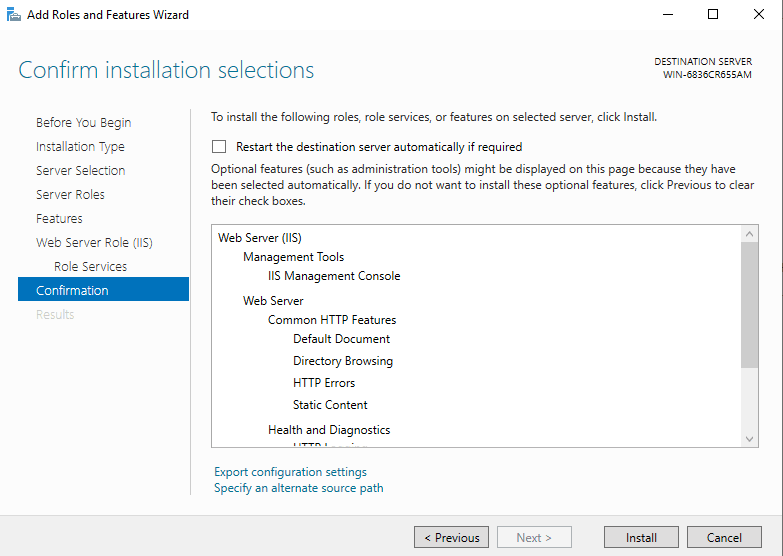
You can install additional IIS services Now or just click Next to install the defaults.
No reboot should be required with a standard IIS installation, however, if you remove the role a reboot will be needed.
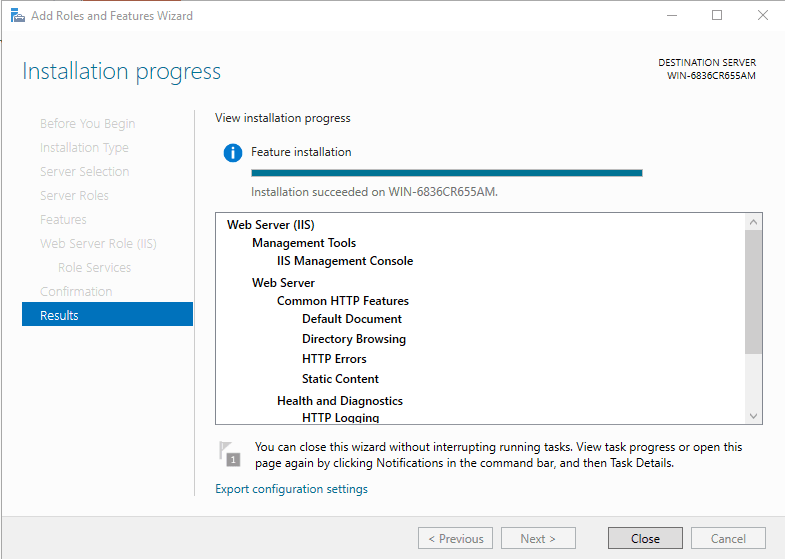
We just finished installing IIS. Now let’s go to the setup part.
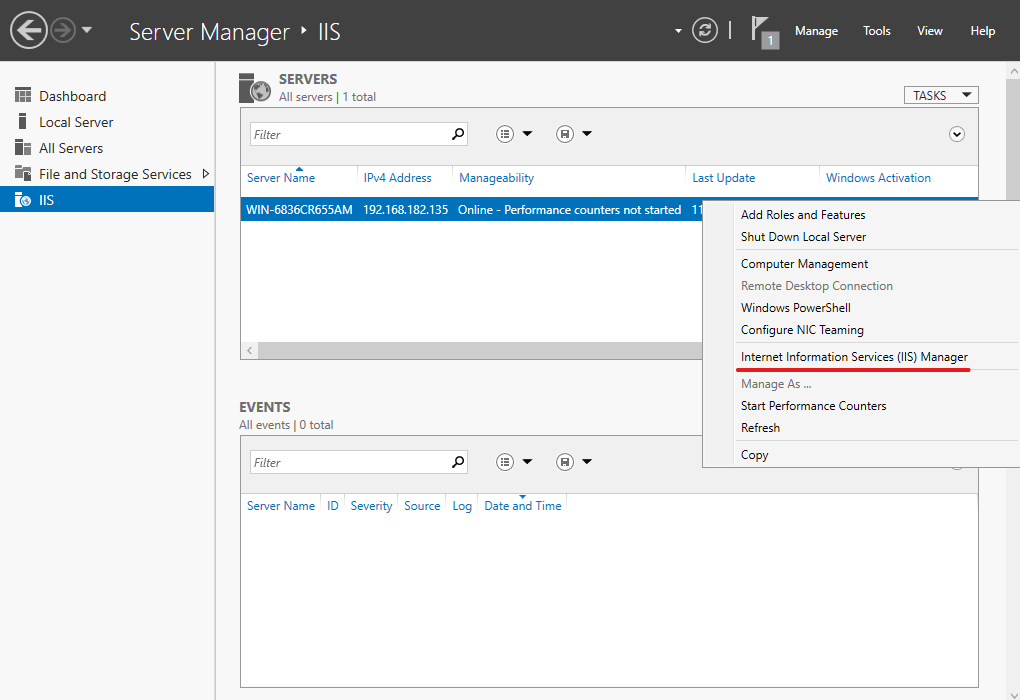
Open Server Manager, select IIS, right-click the server and select IIS Manager.
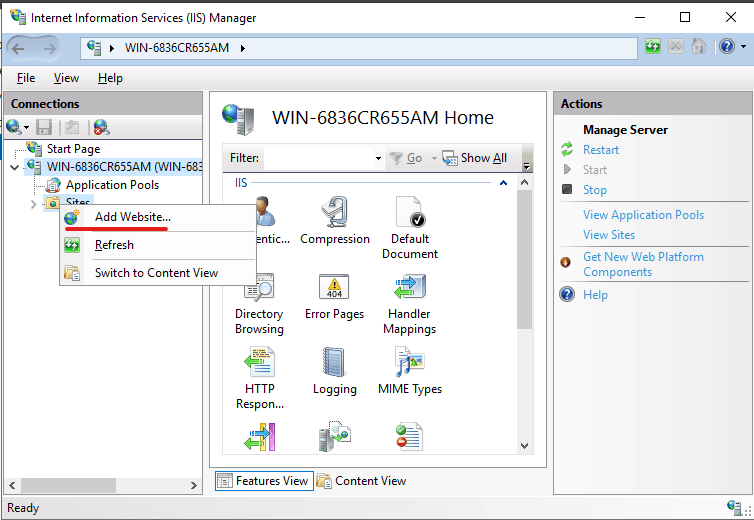
Right-click the Sites node in the Connections window tree and click Add Site.
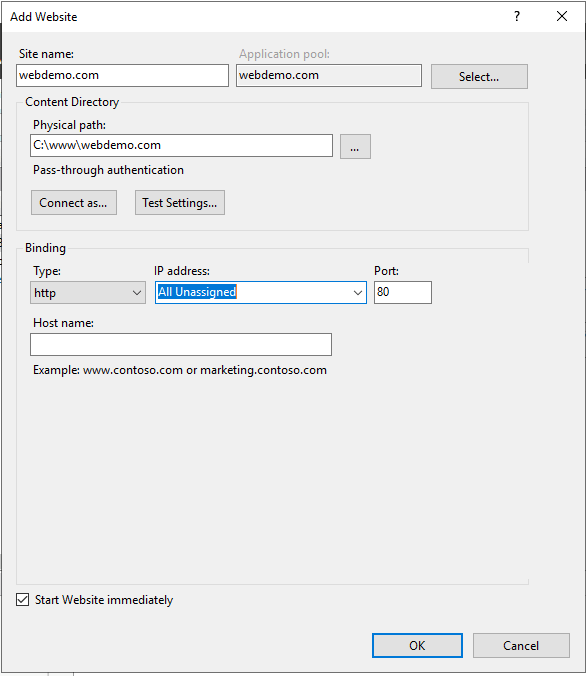
Enter a user-friendly website name in the Site Name box of the Add Site dialog box.
Enter the website’s physical path in the box or use the explore button (…) to navigate the file system. (Note: The ideal method is to create a folder in C: for your websites).
Choose the protocol for the website from the Type list.
Enter the IP address in the IP address box if the site requires a static IP address (the default is All Unassigned).
Enter a port number in the port text box.
Optionally, provide a host website header name in the host header field.
Check the Start Website check box instantly if you do not need to change the site and want it to be available right away.
Then Click OK.
We have now completed adding a website, you can visit it by going to http://webdemo.com.