Docker has revolutionized the way we build, package, and deploy applications. It provides a robust platform for containerization, enabling developers and system administrators to efficiently manage and deploy applications in isolated containers. While Docker itself offers a command-line interface for container management, using Portainer can simplify the process, especially for those who prefer a graphical user interface (GUI).
Portainer is an open-source container management tool that provides an intuitive web-based interface for Docker. In this comprehensive guide, we will walk you through the process of installing and using Portainer to manage Docker containers effectively.
Introduction to Portainer
What is Portainer?
Portainer is an open-source, lightweight, and user-friendly management tool for Docker containers. It provides a graphical interface that simplifies the deployment, management, and monitoring of Docker containers and services. Portainer makes it easy for both beginners and experienced users to interact with Docker through a web browser, eliminating the need for extensive command-line knowledge.
Why Use Portainer?
- User-Friendly Interface: Portainer’s web-based interface is intuitive and easy to use, making it accessible to Docker newcomers.
- Visualization: It offers a visual representation of your Docker infrastructure, making it easier to understand and manage.
- Multi-Platform Support: Portainer is compatible with various Docker environments, including Docker Swarm and Kubernetes.
- Role-Based Access Control (RBAC): Portainer allows you to define user roles and permissions, enhancing security and access control.
- Resource Monitoring: You can monitor CPU, memory, and network usage of containers and services.
- Templates: Portainer provides a library of pre-configured application templates, simplifying the creation of containers.
Prerequisites
Before we dive into installing and using Portainer, ensure you have the following prerequisites in place:
Docker Installation
Portainer relies on Docker, so you need to have Docker installed on your system. You can install Docker by following the official documentation for your operating system. Refer to the Docker installation guide for detailed instructions.
Supported Platforms
Portainer can run on various platforms, including Windows, Linux, macOS, and more. Make sure your system is one of the supported platforms for Portainer.
Installing Portainer
There are multiple ways to install Portainer, but we will cover the two most common methods: using a Docker run command and using Docker Compose.
Docker Run Command
To install Portainer using a Docker run command, execute the following:
$ docker run -d -p 9000:9000 --name portainer --restart always -v /var/run/docker.sock:/var/run/docker.sock -v portainer_data:/data portainer/portainer-ceHere’s what this command does:
-d: Runs the container in detached mode.-p 9000:9000: Maps port 9000 on your host to port 9000 in the container.--name portainer: Names the container as “portainer.”--restart always: Sets the container to restart automatically.-v /var/run/docker.sock:/var/run/docker.sock: Gives Portainer access to the Docker socket.-v portainer_data:/data: Persists Portainer’s data in a volume named “portainer_data.”portainer/portainer-ce: Specifies the Portainer Community Edition image.
Using Docker Compose
Another approach to installing Portainer is by using Docker Compose. Create a docker-compose.yml file with the following content:
version: '3'
services:
  portainer:
    image: portainer/portainer-ce
    ports:
      - 9000:9000
    volumes:
      - /var/run/docker.sock:/var/run/docker.sock
      - portainer_data:/data
    restart: always
volumes:
  portainer_data:
Run the following command to start Portainer using Docker Compose:
$ docker-compose up -dCustom Installations
While the Docker run command and Docker Compose methods are the most common ways to install Portainer, advanced users may require custom installations to meet specific requirements or integrate Portainer into complex environments. Here, we’ll provide step-by-step guidance for custom installations.
1. Installing Portainer with Kubernetes
Prerequisites:
- A Kubernetes cluster up and running.
kubectlcommand-line tool configured to access your cluster.
Steps:
1 – Create a Portainer namespace in your Kubernetes cluster:
$ kubectl create namespace portainer2 – Deploy Portainer using the official Helm chart:
$ helm repo add portainer https://portainer.github.io/k8s/
$ helm repo update
$ helm install portainer portainer/portainer -n portainer
3 – Access Portainer by port-forwarding to a local port (e.g., 9000):
$ kubectl port-forward -n portainer svc/portainer 9000:9000You can then access Portainer at http://localhost:9000 in your web browser.
2. Installing Portainer as a Swarm Stack
Prerequisites:
- A Docker Swarm cluster set up.
- Docker Compose installed on your Swarm manager node.
Steps:
1 – Create a docker-compose.yml file for Portainer:
version: '3.4'
services:
  agent:
    image: portainer/agent
    environment:
      AGENT_CLUSTER_ADDR: tasks.agent
    volumes:
      - /var/run/docker.sock:/var/run/docker.sock
      - /var/lib/docker/volumes:/var/lib/docker/volumes
    networks:
      - agent_network
    deploy:
      mode: global
      placement:
        constraints:
          - node.platform.os == linux
  portainer:
    image: portainer/portainer-ce
    ports:
      - 9000:9000
    volumes:
      - /var/run/docker.sock:/var/run/docker.sock
      - portainer_data:/data
    networks:
      - agent_network
    deploy:
      placement:
        constraints:
          - node.role == manager
networks:
  agent_network:
    driver: overlay
    attachable: true
volumes:
  portainer_data:
2 – Deploy Portainer as a stack in your Swarm cluster:
$ docker stack deploy -c docker-compose.yml portainer3 – Access Portainer by navigating to http://your_swarm_manager_ip:9000 in your web browser.
3. Customizing Portainer Configurations
Portainer allows you to customize its configurations using environment variables and configuration files. You can specify options such as custom SSL certificates, authentication methods, and more by referring to the official documentation.
By following these custom installation methods, you can tailor Portainer to your specific requirements and integrate it seamlessly into your Docker or Kubernetes environments.
Accessing the Portainer Web Interface
Once Portainer is up and running, you can access its web interface by navigating to http://localhost:9000 in your web browser. If you installed Portainer on a remote server, replace localhost with the server’s IP address or hostname.
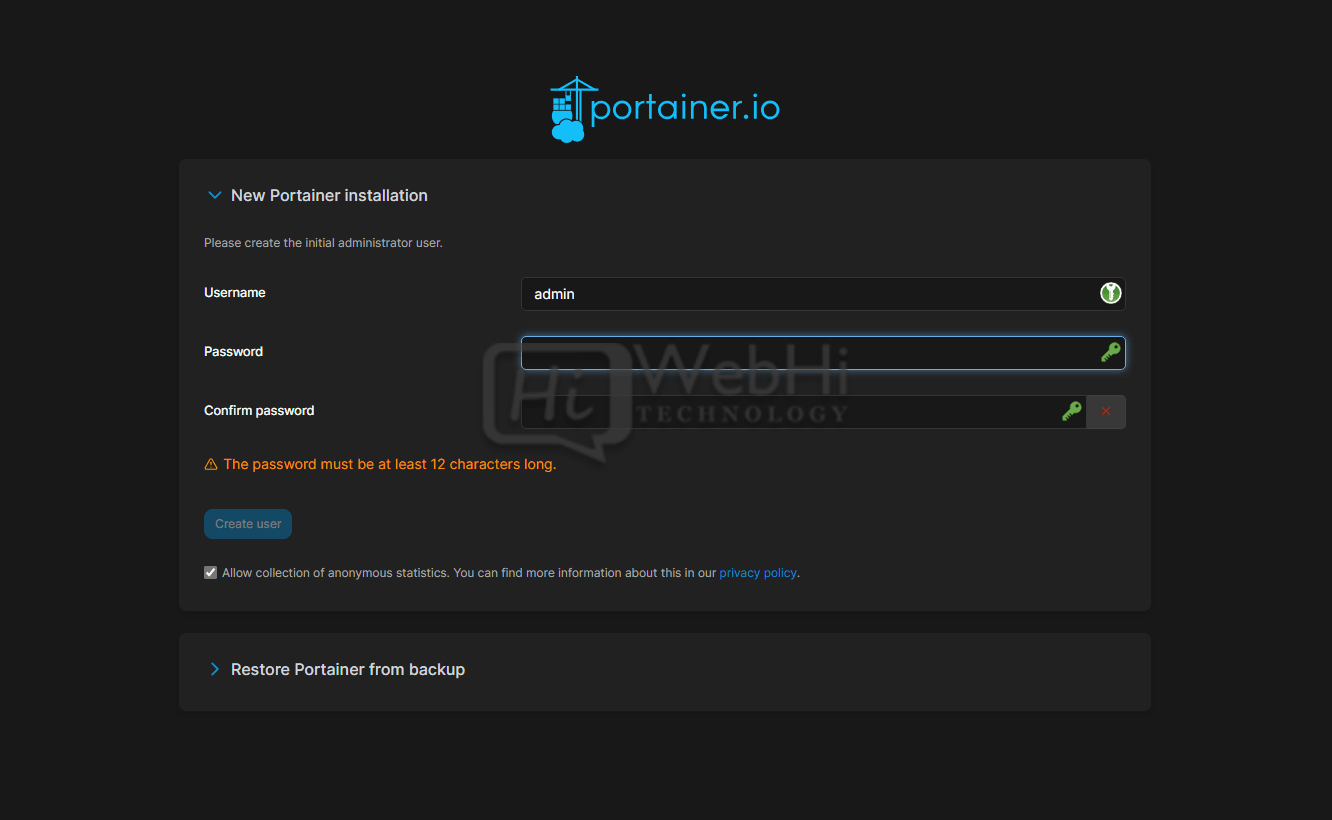
You’ll be greeted with an initial setup screen to create your admin account and configure Portainer.
Configuring Portainer
Creating Admin Account
- Click the “Create administrator account” button.
- Enter a username, password, and email address.
- Click “Create user.”
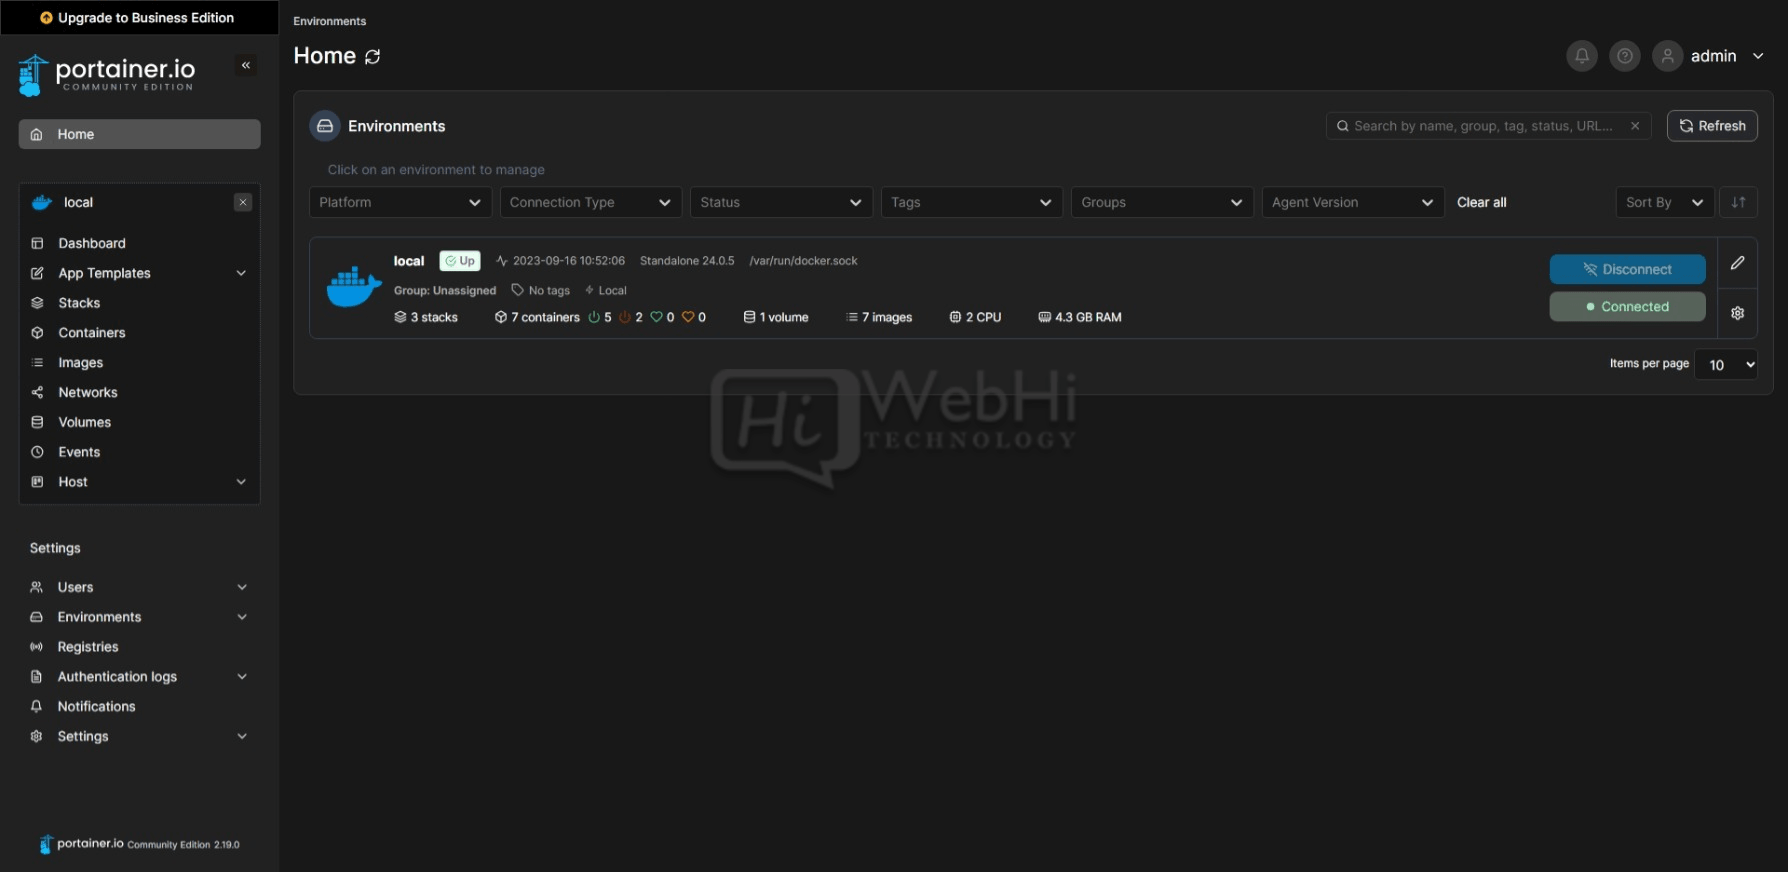
Connecting to Docker Host
Portainer allows you to manage multiple Docker hosts. To connect to your local Docker host:
- Choose “Local” as the endpoint name.
- Select “Docker” as the environment.
- Click “Connect.”
Configuring Data Storage
You can configure the location where Portainer stores its data. By default, it uses a named volume (e.g., portainer_data) for data persistence. You can customize this in the Docker Compose file if needed.
Setting Up User Access and Permissions
Portainer supports role-based access control (RBAC) to manage user permissions.
To create a new user role:
- Go to “Settings”
- Select “Users & Teams”
- Click “Add role”
- Configure role name, permissions etc.
- Click “Create”
You can then assign restricted roles to users without full admin access.
Managing Docker Containers with Portainer
Now that you have Portainer up and running, let’s explore some of its key features for managing Docker containers.
Deploying Containers from Templates
Portainer offers a template library that makes deploying common applications easy.
For example, to deploy a WordPress site:
- Go to the “Apps Templates” section
- Locate the WordPress template
- Fill in the container details
- Click “Deploy the container”
This will automatically pull the required images and deploy WordPress using optimal settings.
Monitoring Containers
The containers view provides real-time monitoring data on status, CPU usage, memory usage, network traffic etc.

This helps identify resource bottlenecks when troubleshooting.
Managing Container Settings
Portainer allows you to modify container settings like environment variables, ports, volumes etc after deployment.
To edit a running container:
- Go to the “Containers” section
- Select a container
- Click “Edit” to change settings
- Click “Update” to save changes
Container Executions
You can also directly execute commands inside a container from the Portainer UI:
- Go to “Containers”
- Select a container
- Click “Console”
- Execute commands in the console window
This allows debugging containers without using docker exec.
Container Backups
Portainer enables taking snapshots of container volumes and filesystems. This allows restoring or migrating data if needed.
To create a backup:
- Go to “Containers”
- Select a container
- Click “Backups”
- Click “Backup” and give the backup a name
The backup will be saved to the host filesystem.
Swarm and Kubernetes Support
Portainer extends its capabilities beyond single Docker hosts. It supports Docker Swarm and Kubernetes, allowing you to manage clusters and orchestrate containers at scale.
Deploying Stacks in Swarm
You can use Portainer to deploy multi-service applications in Swarm using stack files:
- Go to “Stacks” in Swarm environments
- Click “Add stack”
- Configure stack details and compose file
- Click “Deploy the stack”
This will deploy the application across multiple nodes.
Managing Kubernetes
With Portainer’s Kubernetes support, you can simplify management of Kubernetes elements:
- View cluster health, nodes, deployments, pods etc.
- Deploy and scale Kubernetes workloads
- Edit pod configurations and specs
- Manage namespaces, quotas, secrets
All this without needing deep Kubernetes expertise!
Backup and Restore
Data is crucial, and Portainer provides a built-in backup and restore feature. You can export Portainer data as a backup file and restore it when needed. This ensures you don’t lose your configurations and settings.
To create a backup:
- Go to “Settings”
- Click “Backup”
- Select backup options
- Click “Download backup”
Store this backup file securely. You can restore by uploading the backup archive in the same section.
Security Best Practices
Ensuring the security of your Portainer installation and Docker containers is essential. Here are some best practices:
Securing the Portainer Server
- Use HTTPS with a valid SSL certificate
- Restrict UI access to trusted IPs/subnets
- Harden the host OS security configurations
- Follow principles of least privilege for user roles
- Enable authentication with OAuth/LDAP
Securing Docker Containers
- Scan images regularly for vulnerabilities
- Avoid using latest tags. Pin versions instead.
- Limit container privileges via read-only volumes, AppArmor etc.
- Define CPU/memory limits and guarantees
- Use firewall rules to restrict network access
- Monitor logs and metrics for anomalies
Monitoring and Alerting
- Integrate Portainer with Prometheus to collect metrics
- Forward container logs to ELK for analysis
- Set up alerts in Grafana for critical events
- Monitor host and container resource usage
- Get notified for unauthorized access attempts
Conclusion
Portainer simplifies Docker container management, making it accessible to both beginners and experts. By following this comprehensive guide, you have learned how to install, configure, and use Portainer to streamline Docker container operations. Additionally, you’ve gained insights into security best practices to protect your containerized applications.
As you continue your journey with Docker and containerization, Portainer will remain a valuable tool in your toolkit, enhancing your ability to manage and scale containerized applications efficiently. Happy containerizing!